We have a lot of ways we love to use ZAPP! Use the following table of contents to view hacks by section:
The Event Management Table
The Artist Information Page & Applicant History
The Communication Tool
The Application Editor
Creating Artist Accounts
THE EVENT MANAGEMENT TABLE

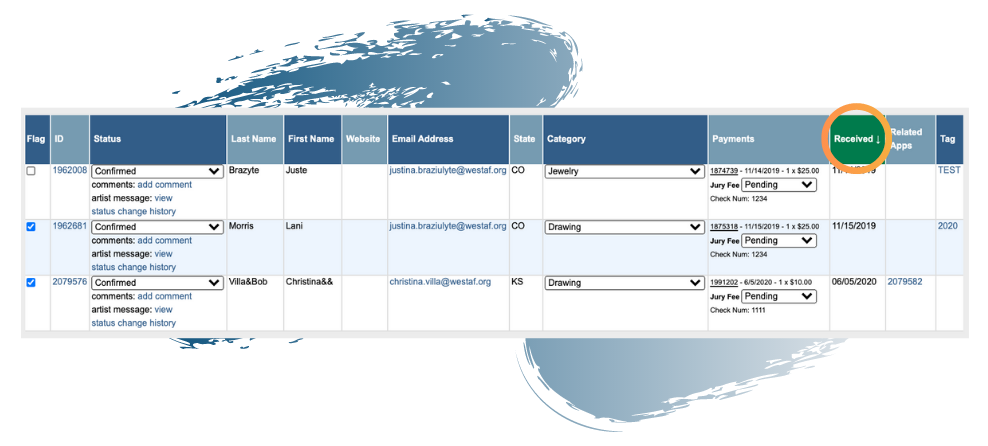
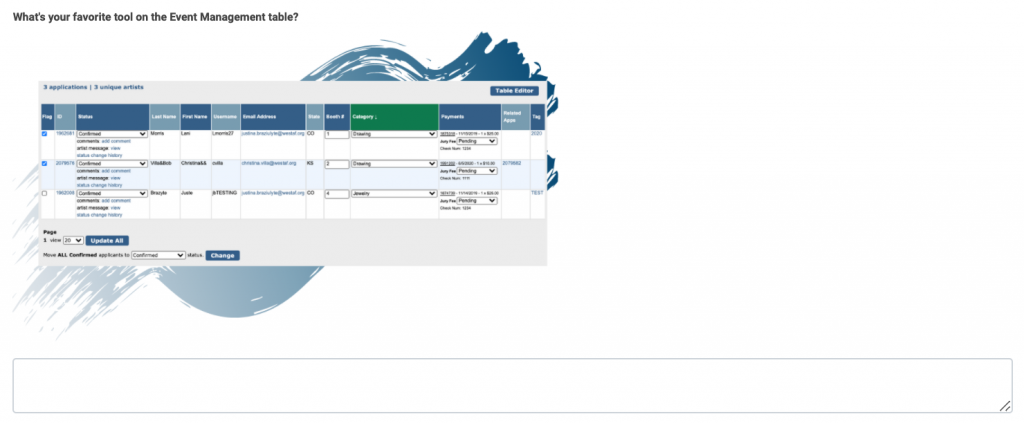
The Event Management table is customizable, contains a wealth of information about your applicants, and provides links to the individual communication tool and the artist information page (the application). While you can use and customize the information on this page in a variety of ways, here are some of the ways our team uses the Event Management table.
Brandon Jay, ZAPP’s customer experience coordinator, changes the fields shown on the table to reflect the information he needs to see during different periods of the application cycle.
Click the “Table Editor” button on the right hand side of the screen to customize the Event Management table.
Favorite Pre-Jury Settings:
Active Fields:
- Received
- Payments
- Category
- Email Address
- State
- Tag
- Website
- Related Apps
Favorite Post-Jury Settings, Invited Artists:
Active Fields:
- Category
- Email Address
- Tag
- Collaborator First Name
- Collaborator Last Name
- Website
- Business/Studio Name
- Related Apps
Favorite Post-Jury Settings, Waitlist Artists:
Active Fields:
- Category
- Waitlist #
- Email Address
- Tag
- Primary Phone Number
- Website
- Business/Studio Name
- Related Apps
Favorite Post-Booth Purchases Settings:
Active Fields:
- Category
- Booth #
- Email Address
- Tag
- Collaborator First Name
- Collaborator Last Name
- Related Apps
- Payments
Mareike Bergen, ZAPP’s operations coordinator, takes advantage of the ability to sort the Event Management table. To sort the Event Management table, click the header for the field you wish to sort by.
Bonus! Pre-Jury Event Management from Brandon:
Review artists before you jury and move applicants without application issues to the Reviewed status and move applicants who need to correct their applications to the Incomplete status (or the Exception status if your application deadline has passed). Reviewing applications periodically before your jury saves you from reviewing all at once or having applications that violate rules (think watermarks on images) in your jury. Just make sure to move all applications to be juried back to Received before your jury begins!
When it comes to information on the Event Management table, there is a lot you can view at a glance—from email addresses to custom tags. A favorite tool of Natalie Villa, the project manager at WESTAF, is to use the Status Change History to determine exactly when an applicant moved from one status to another.
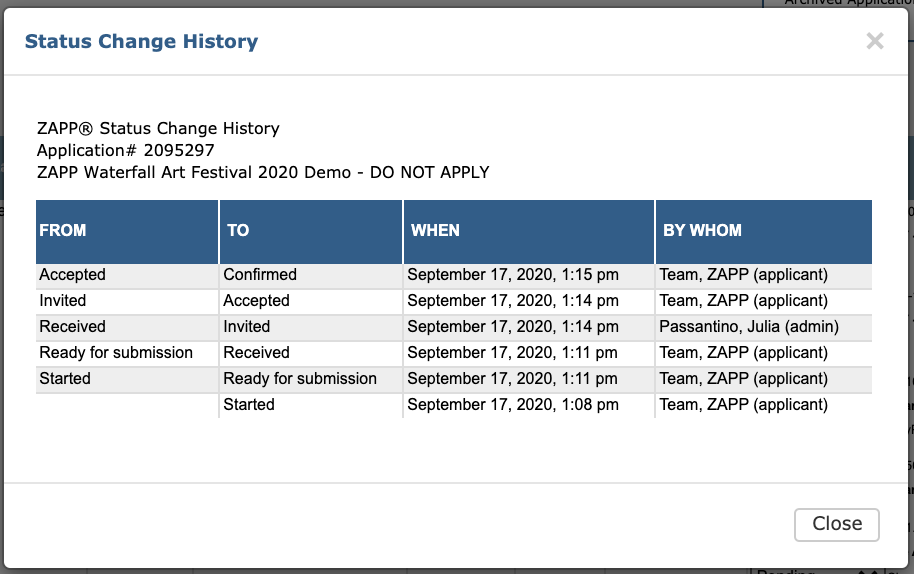
Not only can you see when an applicant moved from one status to another, but you can also see which administrator account moved the applicant. This information is particularly useful for administrators with multiple people on their teams.
THE ARTIST INFORMATION PAGE & VIEWING ARTIST HISTORY
Christina Villa, WESTAF’s director of business operations, consistently uses the Artists tab to find past applicants and review application history.
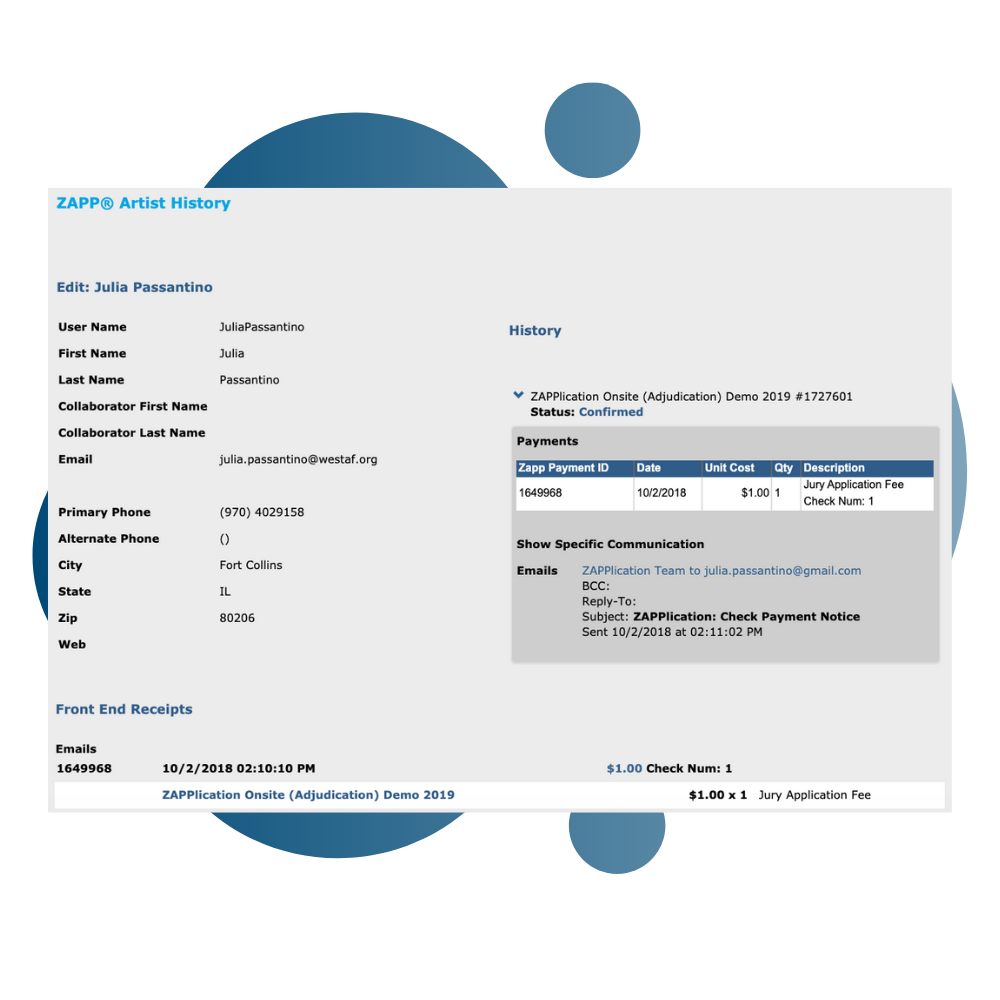
You can pull up an applicant’s submission history with your organization by searching for them within the Artists tab and then clicking on “Application History.” On the Artist History page, you will then be able to review contact information, past purchases (and refunds, if any refunds were processed through ZAPP), and communications sent to the artist. Click on the status for a past event to be taken directly to the applicant’s Artist Information page for the event.
On the Artist Information page itself, one of Mareike’s favorite tools is tagging artists.
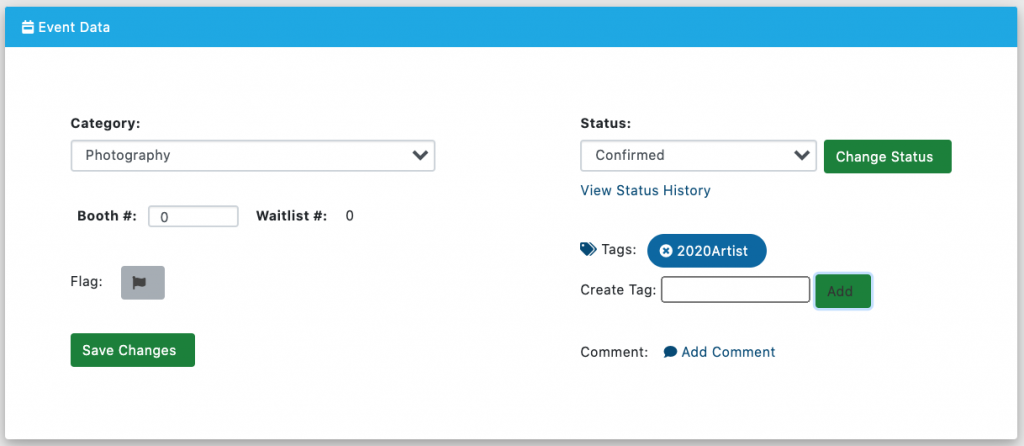
You can add up to three custom tags to an artist application to help you stay organized. Mareike recommends tagging exempt from jury artists as “Exempt” and moving them to the Invited status rather than the Exempt from Jury status so they have the normal workflow of accepting their invitation and then purchasing a booth (Exempt from Jury artists do not have the option to accept an invitation and must instead go right to the ZAPP Shop to purchase a booth and confirm their attendance).
THE COMMUNICATION TOOL
One of our most exciting new features is the ability to send targeted emails to artists using tags (a favorite of Natalie). You’ll need to tag the artists you wish to send a segmented email to first, but once you do, all you need to do is select the status then choose to include or exclude tagged/flagged applicants.

Once you select the statuses and/or tags you want to email, it’s time to build the email itself. ZAPP has a few handy options for merging information. Of them, merging booth numbers was on Brandon’s list of best ZAPP tools. By checking this box, ZAPP will automatically include the booth numbers you added on the Event Management table into the email to your artists. Each artist will only receive their own booth number. You can also use the waitlist tool to send waitlist numbers to ZAPP artists.
THE APPLICATION EDITOR
When it comes to building an application, ZAPP has five question types to help you customize and collect the information you need. Earlier this year, we implemented conditional logic for custom questions and the feature quickly became a favorite of Julia Passantino, ZAPP’s communications and support coordinator.
Conditional logic essentially allows you to create questions that are only seen by certain groups of artists. Julia’s favorite example for 2021 is using conditional logic to ask certain questions to artists rolling over from 2020 and other questions to new 2021 artists. Follow the example below to learn how to create a series of conditional questions:
- Create a single select question, “Are you a 2020 artist?” with options of “Yes” and “No.”
- Create a new question specifically for 2020 artists, such as “What was your booth number in 2020?” and check the “Yes” box to enable conditional logic. Then select that the question only shows if the answer to the first question created is “Yes.”
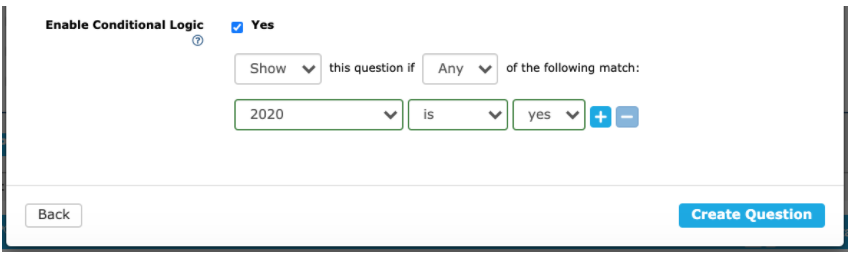
- To create a new question specifically for 2021 artists, check the “Yes” box to enable conditional logic. Then select that the question only shows if the answer to the first question created is “No.”
- Create as many questions as you want for each applicant group. As a bonus, you can now make these questions required since only applicable entrants will be able to view your group-specific questions.
Also new to the Application Editor is the ability to add images into your custom questions. Natalie likes to use this tool when asking for booth requests. Simply add an image of your booth map into a word document or google doc and copy and paste it into the question field of your custom question editor.
CREATING ARTIST ACCOUNTS
Last, but not least, is registering for a free artist account and going through the process of applying to your own event. Christina likes to do this for a variety of reasons:
- Apply to your own show with a coupon code! Then you’ll know exactly how to instruct your artists if they have any questions. You’ll also be able to see how your event shows up in search results on our various lists, view your application in its entirety, and see how products show up in the ZAPP Shop.
- If you need to help artists make changes to their application, you can first move your own application to Incomplete (used before your application deadline) or Exception (used after your application deadline) to see how the process works for yourself.
- You can also send yourself a test email if you have a personal artist account you’ve used to apply to your event. This is particularly useful if you want to do a “test run” of jury invitations and see how the format will look to artists. Simply click on your own email address within the Event Management table or on the artist information page for the application you submitted and send yourself the email first before you send it to applicants.
Creating a free artist account allows you to see your entire process from the point of view of an applicant and we recommend it for teams of any size, whether you’ve been using ZAPP for a year or 10.
Have an idea for a blog? A suggestion for ZAPP? Email us at contactzapp@westaf.org